The Stair by Component tool in Revit will automatically create a Stair, based on a set of parameters. It also allows for Custom Shapes with its Create by Sketch option, though most stairs can be created from the simple Straight option.

 By default, both Run and Straight should be selected on the Create Stair, Modify ribbon.
However, before drawing anything select the Monolithic Stair (the default Cast-In-Place type) in the Properties Browser and Edit Type.

Of all the parameters, Max Riser and Min Tread are important to have correct before modeling the stair. These parameters are “guidelines” for drawing the stair, and changing these parameters will not adjust a stair that already exists. Min Run Width is also a default, but it can be adjusted during or after stair creation. I am going to create a stair with a 12″ tread and 6″ riser:

 Before starting the stair, adjust the Base Level and Top Level in the Properties Browser. By default, Revit will try to create the stair using Levels as the Base and Top. This is a building feature, as stairs will will connect from First Floor to Second Floor.
But in the site this is not always applicable. If your landscape has several set terrace heights, it would be useful to use Levels. If not, you can simply specify Base Level and Top Level relative to Sea Level. The trick to this is that the Top Level cannot be lower than the Base, so modify the Top before the Base.
 The top and base can be adjusted after creating the stair, but having them correct before drawing the stair will result in less errors. You can also check the Desired Stair Height, to make sure it is correct.
The Location Line and Actual Run Width can be modified before/ while drawing the stair, using the small green modify ribbon.

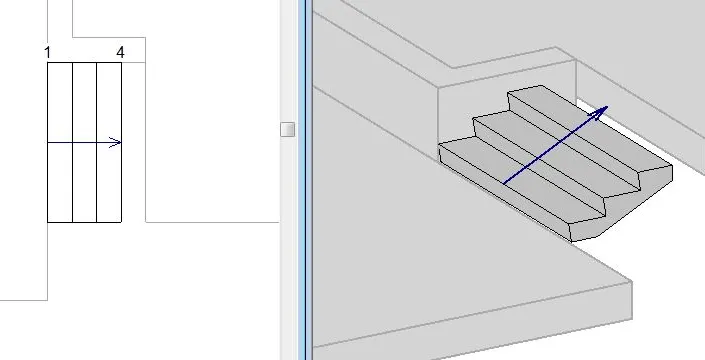
At first, the stair will be incomplete, without the top step…

…but simply select the Stair, uncheck End with Riser (in Properties), and then you can drag the stair (using the blue circle) and it will create the final step.

After finishing the Stair, Revit automatically generates a Railing for the stair. It is the default Rectangular type, which I will always change, if not promptly delete.

Since there is a 1″ Nosing, the Floor also needs to be adjusted so that there is not a gap.


The Nosing parameters, along with several other parameters, are hidden under Run Type. These can be adjusted after the stair is created (click on the […] button on the far right).

This will take you into the Type Properties for another (nested) System Family. Here you can control the structure, material, nosing, and (if desired) the treads and risers [read about this in more detail in Stair Nosing, Treads, and Stringers].

And finally, here it is again in Section.


Can you add a grade beam around the perimeter of the stairs for conditions with poor soils? Thanks.
Do you mean something like this- https://landarchbim.files.wordpress.com/2014/11/stair_grade-beam.jpg? This is just a stringer, which does not necessarily behave quite like you’d want it to. Other options would be to model in place or use a wall.
I like it, especially dealing with the nosing, that was a royal pain the first time I tried
Yes, the Nosing Family acts a bit funny, but I think I’ve figured it out. I’ll be doing another post on more details like nosing and treads.